
Teams and groups · 6 min read
Customize welcome messages, footers, and rejection notices
Add useful welcome and footer context while preserving required identity and rejection copy.
What each notice does
- Welcome message goes to each eligible address when its person joins the group. Required identity and contact-list copy comes first; you may add optional text below it.
- Message footer appears on distributed group messages. Optional group text appears above TellTell’s required identity and unsubscribe footer.
- Bounce message explains that a sender was not allowed to email the group. This required product copy is fixed.
Customize the optional copy
- Open the group and choose Notices
The page previews required copy with editable optional regions.
- Add a welcome note
Include concise expectations, a coordinator contact, or the group’s purpose. Select text and use the link button to connect it to a website. Do not repeat the address already present in required copy.
- Add an optional footer
Use it for stable context that should accompany every message, not for content that belongs in one email.
- Save changes
TellTell sanitizes the supported formatting and website links, then stores matching HTML and plain-text versions.
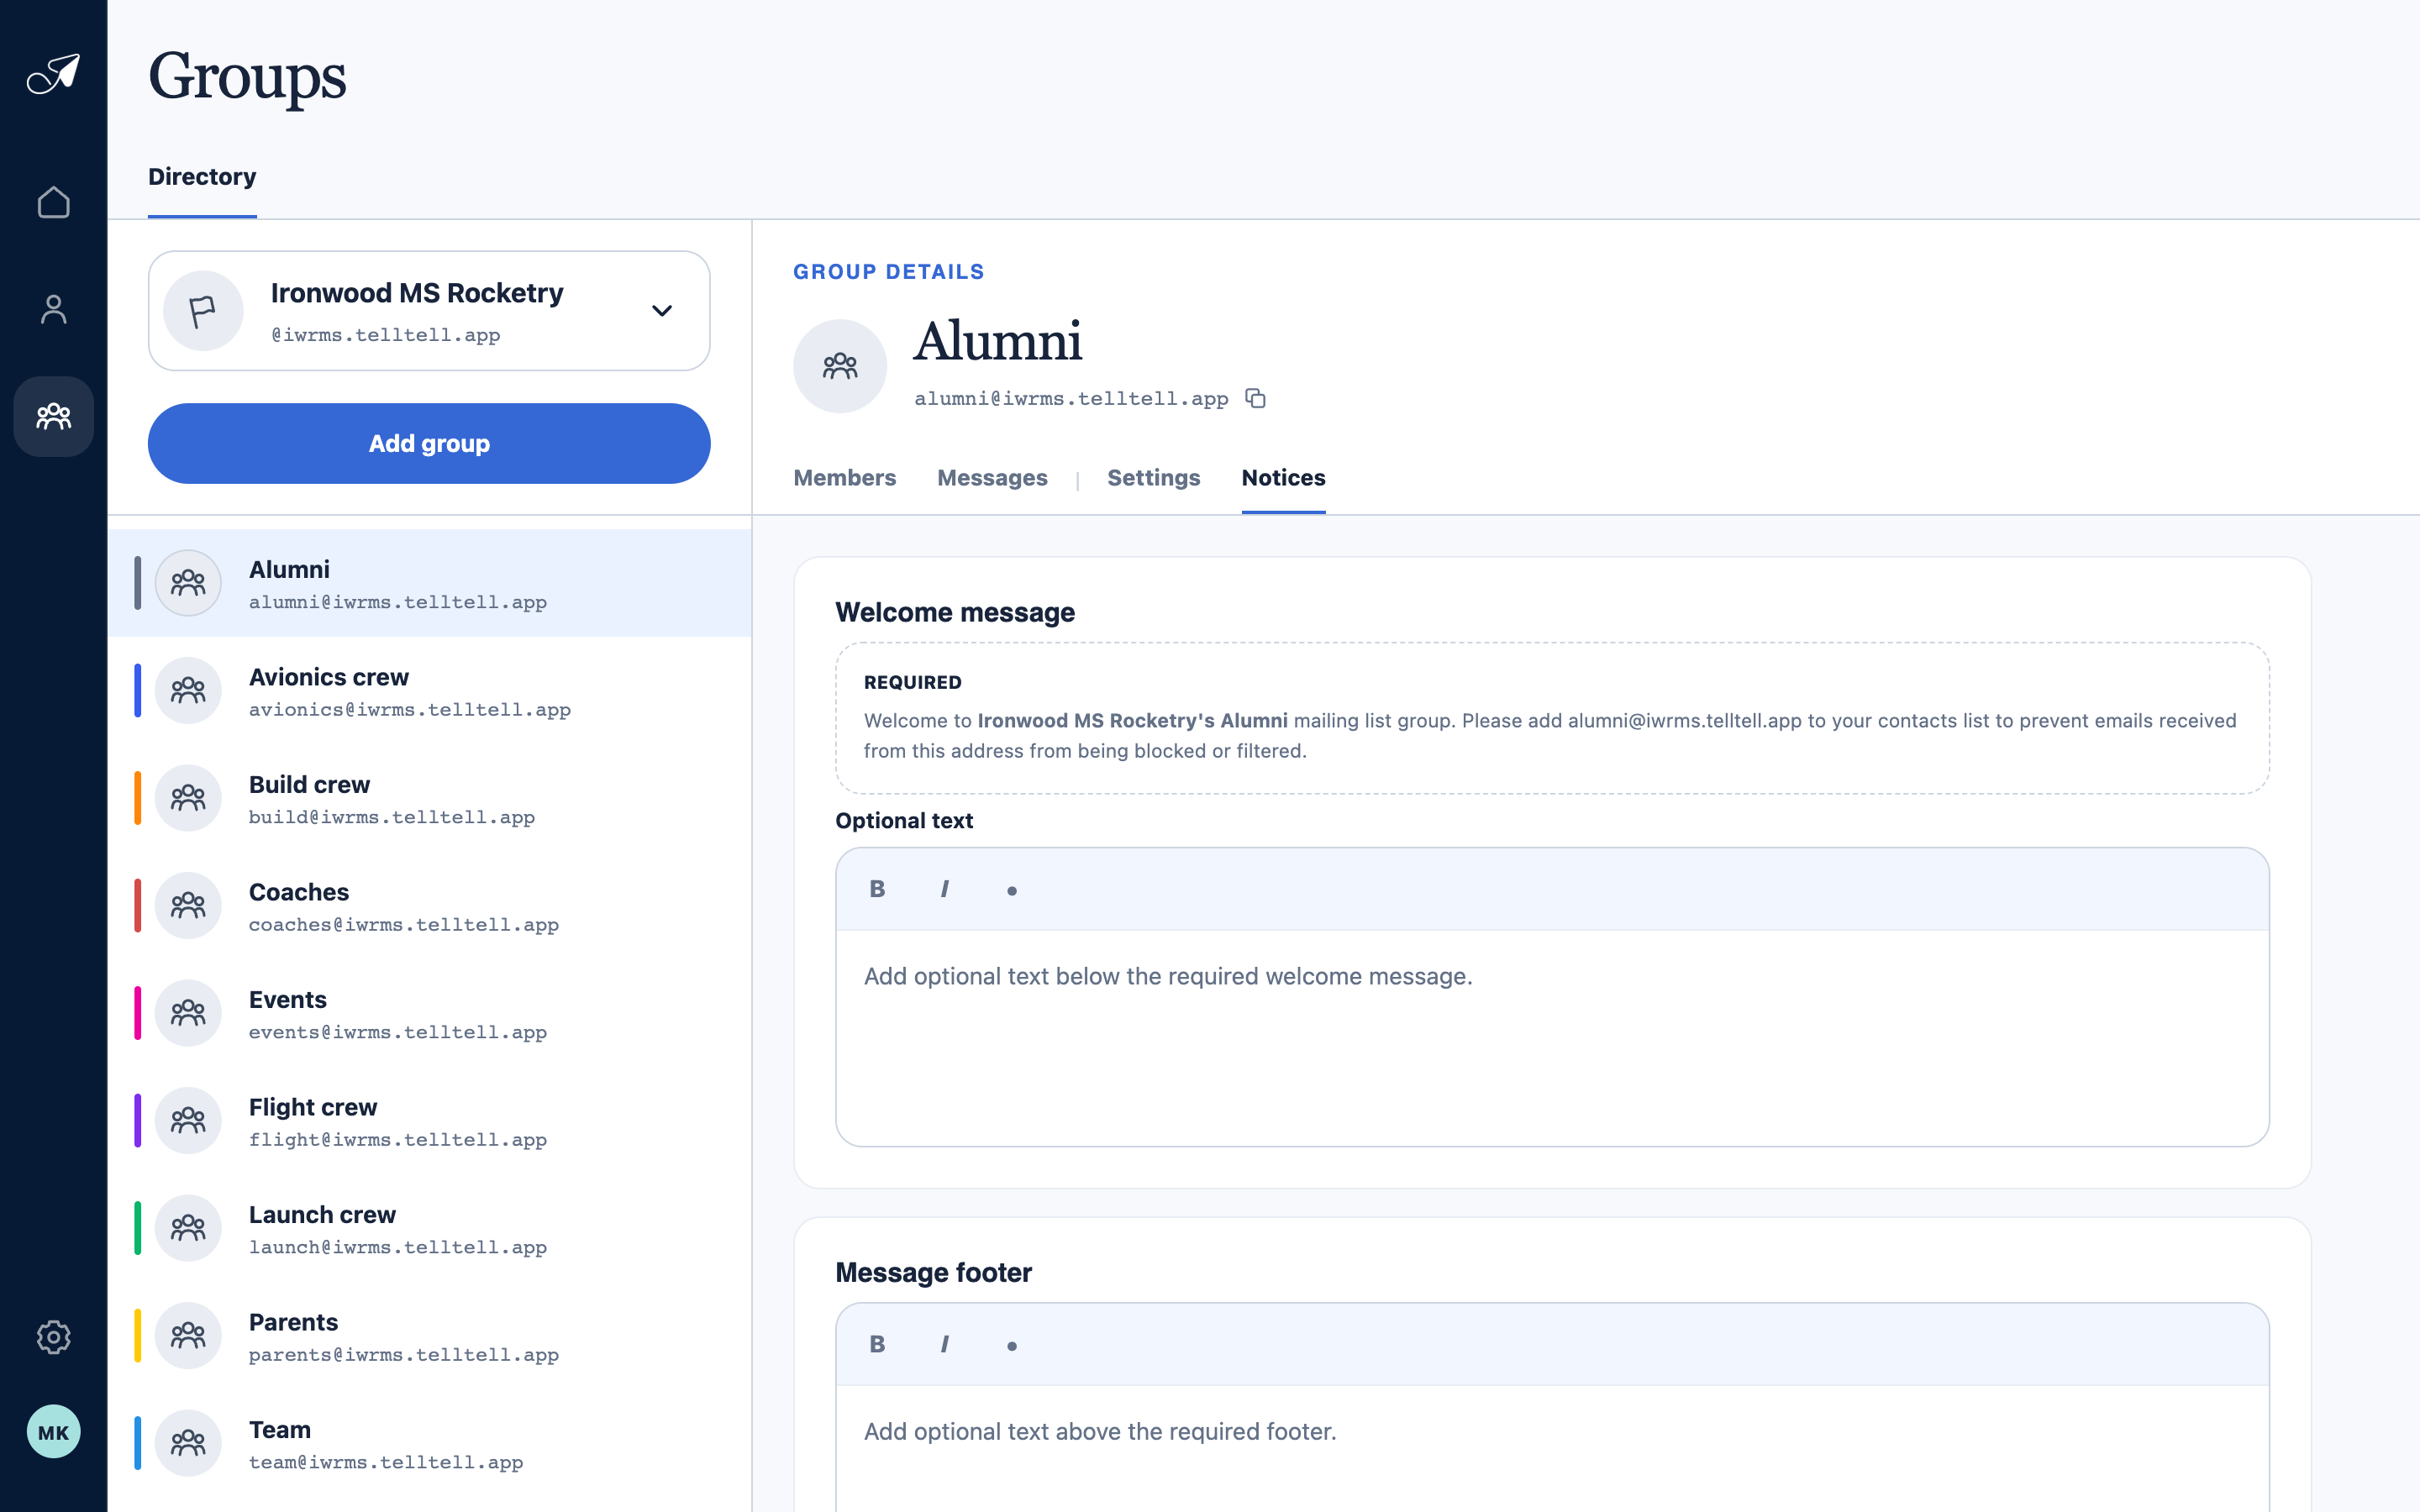
Required product copy stays visible while organizers add only the group-specific context members need.
- 1Selected group and address
- 2Required welcome copy
- 3Optional welcome text
- 4Optional message footer
When notices are sent
Welcome messages are queued when a membership is added, including address-level deliveries for every eligible address affected by that addition. Removing a membership does not send a notice.