
Sending and delivery · 6 min read
Troubleshoot a rejected message
Use the recorded rejection reason to correct sender, group, account, content, or limit problems.
Start with the rejection reason
- Open the group Messages tab
Select the rejected subject and read the reason and suggested next step. A rejected message stopped before fan-out.
- Verify the exact From address
Compare the authenticated sender address with the group's sender permissions. Check aliases and the person's active addresses.
- Check the group and account
Confirm that the group and account are active, replies are allowed for reply traffic, and billing access has not been paused.
- Check content and limits
Review message size, recipient count, supported email-variable count, and any short-term quota guidance in the rejection.
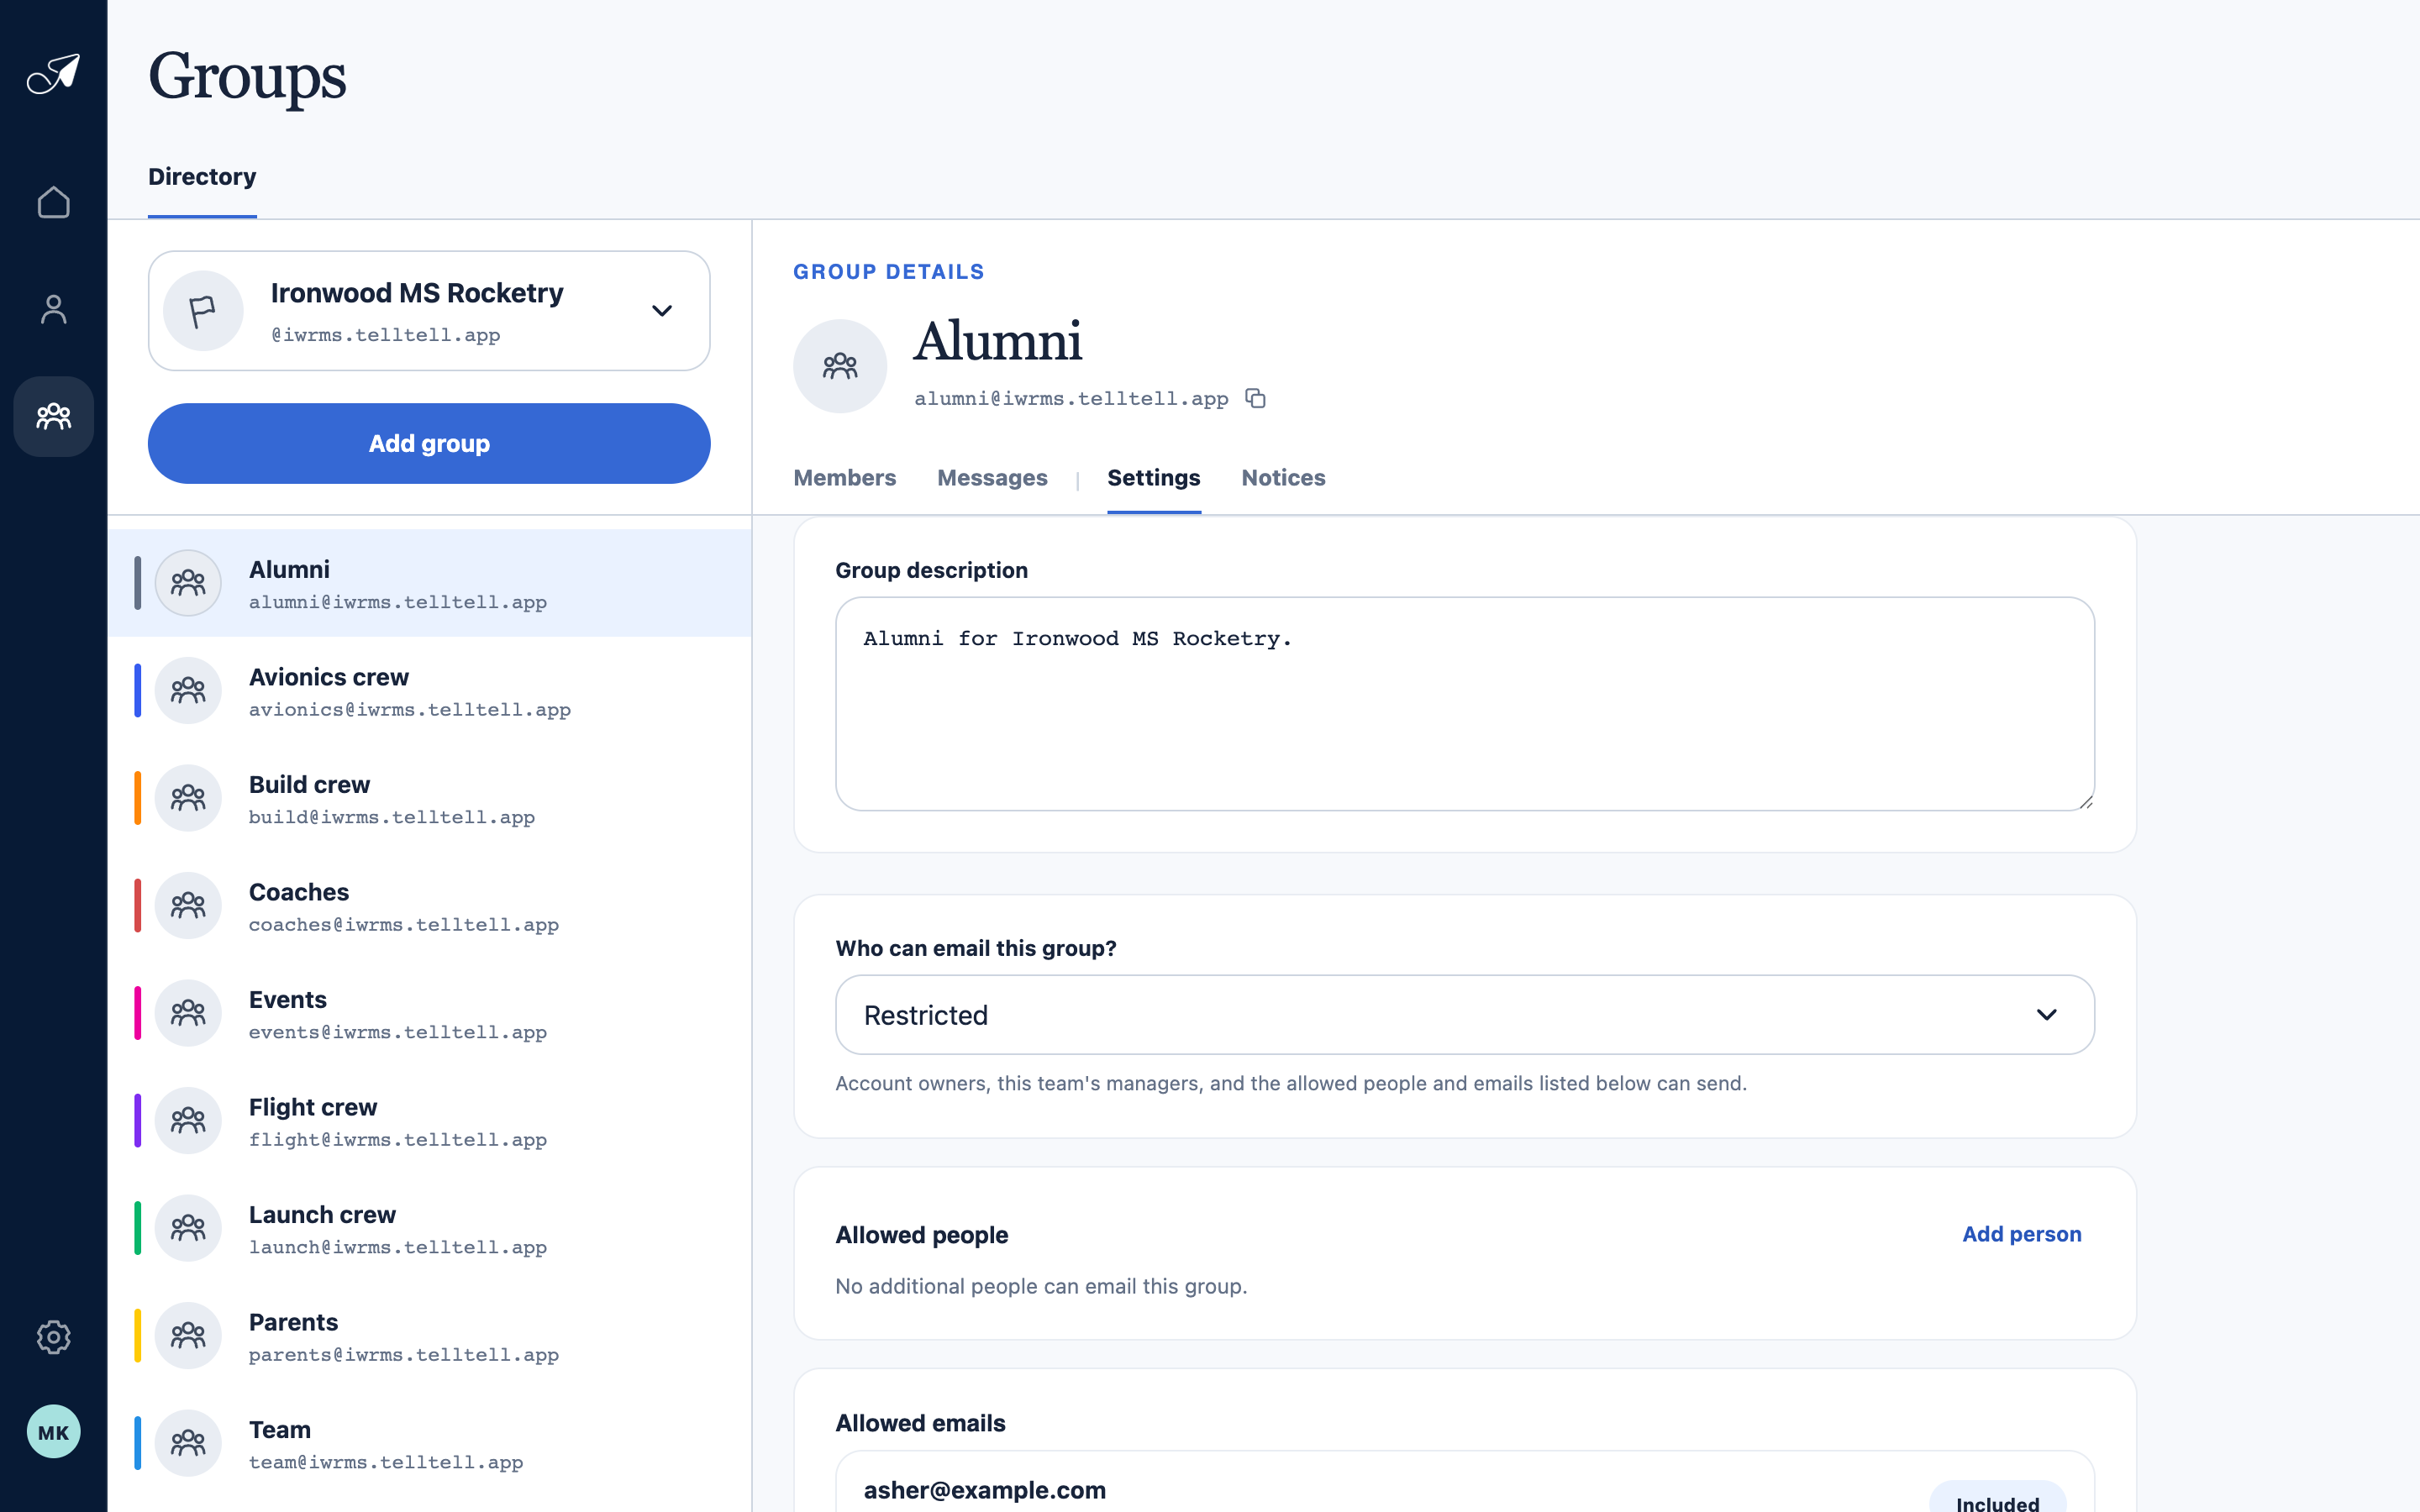
Sender permission is checked against the authenticated From address on every incoming group message.
- 1Who can send setting
- 2Selected sender policy
- 3Explicitly allowed people
- 4Explicitly allowed email addresses
Correct the cause, then send a new message
- For sender or authentication failures, send again from an allowed, provider-authenticated address.
- For an unknown or inactive group, confirm the current managed group address in TellTell.
- For a size or recipient limit, reduce the message or group before resending.
- For a temporary account, group, or safety quota, follow the retry time shown in the rejection.
- For protected, automated, looping, malformed, or possible-virus messages, remove the triggering content or send a fresh normal message.